Purchase
You can purchase PatchImporter now from our sales site. Simply click the button below to be taken to the checkout.
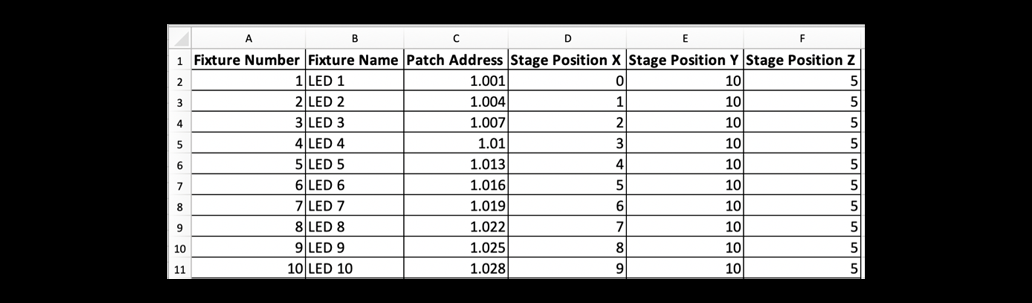
Purchase PatchImporterPatch Importer is a plugin to help import patch information from a CSV document, often sent by a Gaffer or exported by software such as WYSIWYG or a partial MVR read. This plugin can modify existing fixtures to match the new information, or create new fixtures with the data provided.

Ensure your CSV or MVR file is placed within the designated directory on your registered USB drive: "/MATools/PatchImporter/". This directory is automatically generated upon initial registration of the plugin. Additionally, MVR files located in the MA3 directory under "/gma3_library/mvr/" will be listed by the plugin.


When importing from a CSV file, confirm that the first line of the document contains the column headers corresponding to the data. You'll be prompted to match these headers in the subsequent popup.

In the CSV Import Dialog, you'll be guided to assign the CSV headers to the corresponding patch data within MA3. Utilize the "+" icon to access a dropdown list of headers extracted from your CSV document, ensuring accurate column assignment. It's imperative to assign the "FID" column before proceeding to the import dialogue, elaborated further in this manual.
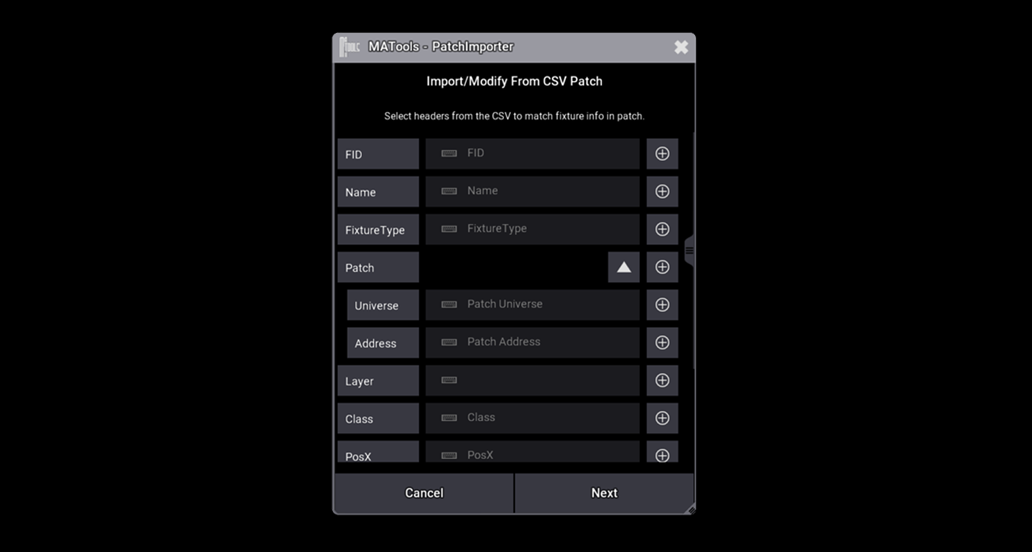
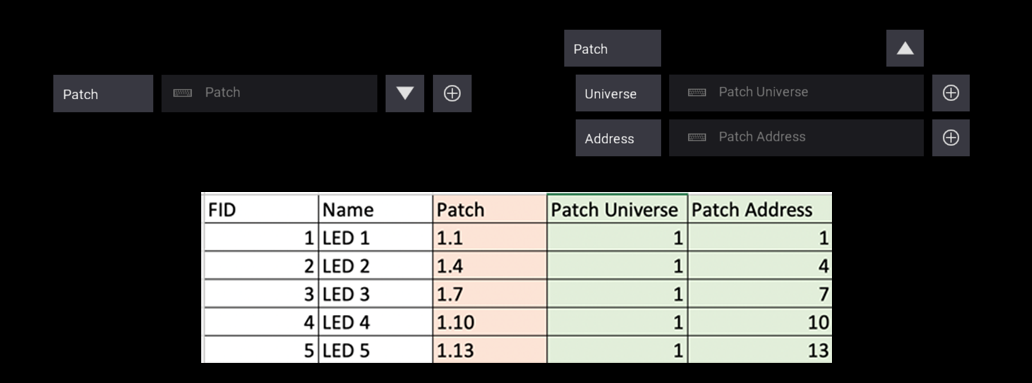
Patch Importer adeptly manages CSV files regardless of whether the patch data is consolidated in one column or dispersed across multiple columns. Easily toggle between displaying column headers for universe and address separately or combined by clicking the respective arrows.
Patch Importer facilitates partial import or update of data from MVR files, enabling the consolidation of multiple MVR files into a single GMA3 show or the implementation of changes to an original MVR file. Simply select the desired MVR file from the presented popup list to initiate the import dialogue, as detailed later in this manual.
The import dialogue shows you the data read from your CSV or MVR file and allows you to select which data you wish to import.
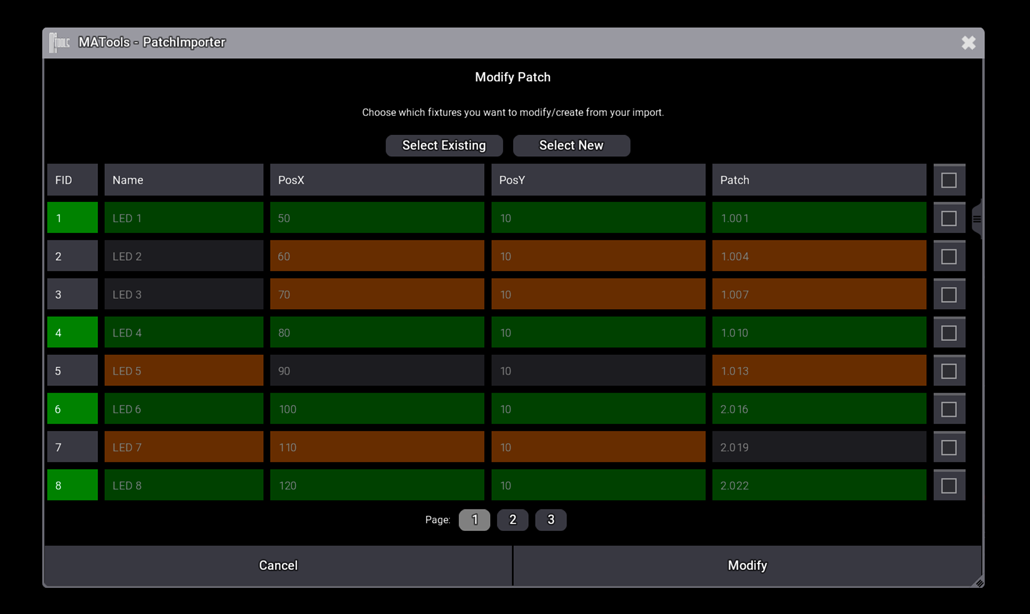
If you just want to bring in information for fixtures that already exist in your showfile, click on the “Select Existing” button. You can also only choose to import new fixtures by clicking “Select New”.
Use the checkbox to the right of the headers (top checkbox) to select all fixtures to import.

You can use the checkboxes to the right of the imported data to individually select or deselect fixtures you wish to import data for.

You can tap on the column headers to select all data in a column. For example, you may just want to import the updated patch information for a set of fixtures.

You can import individual cell data by tapping on the cell to highlight it. If a cell is highlighted, you can tap on it to stop that data from being imported. For example you may just want to modify the patch of one fixture from the data set.
If you have more than 200 fixtures worth of data to import, you will see pages appear at the bottom of the popup. Use these buttons to navigate your imported data.

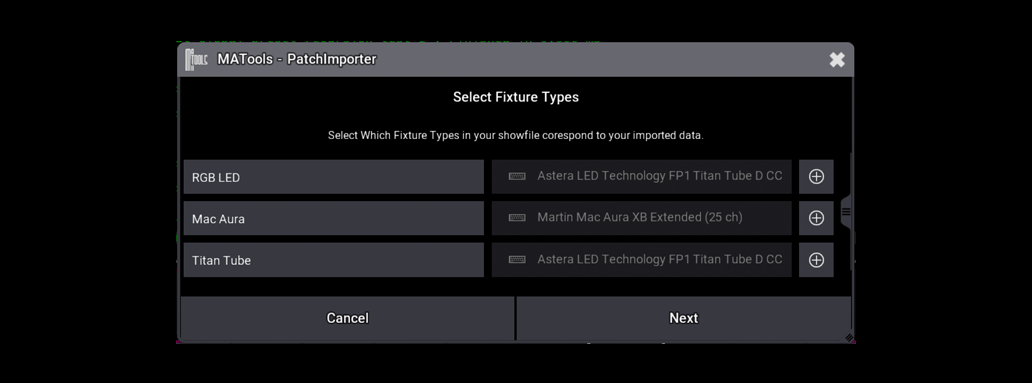
If you have specified a column for fixture types on your CSV or have assigned them in your MVR, when creating new fixtures you can assign fixture types from the plugin without having to enter patch to assign them later.
Patch Importer will attempt to auto-fill the fixture types you have in your CSV if they already exist in your showfile. If the fixture type does not currently exist or a match can’t be found, you can select “Choose In Patch” from the drop down list so you can assign the fixture type in the patch menu later.
In your CSV, fixtures with the same named fixture type will be assigned the same fixture type once you fill out the popup.
You can purchase PatchImporter now from our sales site. Simply click the button below to be taken to the checkout.
Purchase PatchImporter